From time to time on Stamp Club days - at lunch - we talk about good books we've read. I jotted some down and got them for Christmas -- some still waiting to be read.
One I heard about at a Bible Study last year I finally got and thoroughly enjoyed.
When Crickets Cry - by Charles Martin.
I also ordered some other books by him - Wrapped in Rain was excellent also.
I have several others, but haven't read them yet. And I noticed on Amazon.com that he had just had a new one come out.
And if you've read the Mitford Series books (some of my all time favorites - very light, enjoyable reading) by Jan Karon - there is a new companion novel - Home to Holly Springs. That was enjoyable also, although not quite as light a fare as the series. Also made me think of Laura as I think Holly Springs is close to Madison where she and Scott and the kids moved last year. Or it may be that Holly Springs is close to Jackson where her mother is (am I right Laura?) I think it mentioned Jackson in the book - but I couldn't find it when I flipped back through it to look. We miss you Laura!
I asked those that came to Play Day the other day to send me a list of books they've read and enjoyed -- so I know what to add to my Wish List! Thanks, Pat, for sending me your list!
Oh - by the way - "Eddie" said that Kathy Bradley's (who has the column in every other Sunday's paper) book is on preorder now through Amazon. I love her writing - the way she paints pictures with words - so I know I'll order her book soon.
Wednesday, February 1, 2012

News from Stampin' Up!
Exciting things are going on with Stampin' Up! right now. The annual Sale-A-Bration has started where for every $50 you spend, you get a free SAB goodie for FREE! This promotion lasts until March 31, 2012.
Details here.
**********
Any time you are shopping online, make sure my name is in the upper right corner. Also, if you don't click in the store for about 20 minutes, it is my understanding that it will default to http://www.stampinup.com/ and you will be ordering directly from Stampin' Up! and not through me. You will pay more and won't get any freebies.
You can also phone in orders to me: 912-839-2161.
Remember that if you order online if your order is over $150, you will qualify for Freebies just like if you hosted your own one person workshop.
So be sure to get the very best prices and any freebies you may qualify for by clicking on my Stampin' Up! website:
http://www.stampinup.net/esuite/home/helencashon/
(And use this site and go to Shop Now if any of the above address links don't work - this is the first time I've tried to include those direct to what I'm talking about areas of my Stampin' Up! website. Always remember to check out the Clearance Rack too! (Clearance Rack items can only be ordered through an online order.)
**************
Also -- we can download My Digital Studio Express for a FREE 30 day trial offer. This offer lasts until the end of February.
CLICK HERE to download MDS Express for FREE for 30 days.
With the FREE trial, you'll get:
- Full access fo the software at NO COST for 30 days.
- Full design functionality.
- Exclusive artwork that comes with My Digital Studio Express. Content here.
- Opportunity to purchase additional downloads from designer paper to stamp brush sets - and everything in between.
- Access to Stampin' Up!s professional print services.
Once your trial period expires, simply contact me or go through my Stampin' Up! website to purchase the downloadable or disc version of the software to continue enjoying and creating with My Digital Studio.
*********
Also, Stampin' Up! recently announced some changes to the catalog program. Sometimes customers were overwhelmed with the offerings in the mini catalogs and felt they didn't have enough time to purchase all the items they wanted. I know I've felt that way. Stampin' Up! listened!
Now there will be only two seasonal catalogs a year in addition to the main catalog. Those two seasonal catalogs will be a little larger and will last longer - 5 months each. The Occasions, Summer, and Holiday mini catalogs will be replaced the the two seasonal catalogs called the Holiday Catalog and the Spring Catalog. The first Holiday Catalog will run from August 1, 2012 to the begining of January 2013. The first Spring Catalog will run from the beginning of January 2013 through May 31, 2013.
The name of the main catalog will change from Idea Book and Catalog to Annual Catalog. The Annual Catalog will run from June 1, 2012 to May 31, 2013. The Annual Catalog will be reduced from over 240 pages in the current Idea Book and Catalog to about 208 pages.
The Definitely Decorative vinyl elements and the Simply Adorned jewerly offerings will not longer be offered.
Please take note: The current Idea Book and Catalog will retire May 31, 2012 - a month earlier than the date printed on the back of that catalog. I just want to make sure you know this so that you can plan ahead.
Recap:
- There will not be another mini catalog right after the current Occasions Mini ends April 30.
- The new Annual Catalog comes out in June.
I anticipate that we will get the current Idea Book and Catalog retirement list in a timely manner closer to May so that we will know the items that will retire from the main catalog. I'll let you know when that list is available.
************
Let me know if you have any questions.
Details here.
**********
Any time you are shopping online, make sure my name is in the upper right corner. Also, if you don't click in the store for about 20 minutes, it is my understanding that it will default to http://www.stampinup.com/ and you will be ordering directly from Stampin' Up! and not through me. You will pay more and won't get any freebies.
You can also phone in orders to me: 912-839-2161.
Remember that if you order online if your order is over $150, you will qualify for Freebies just like if you hosted your own one person workshop.
So be sure to get the very best prices and any freebies you may qualify for by clicking on my Stampin' Up! website:
http://www.stampinup.net/esuite/home/helencashon/
(And use this site and go to Shop Now if any of the above address links don't work - this is the first time I've tried to include those direct to what I'm talking about areas of my Stampin' Up! website. Always remember to check out the Clearance Rack too! (Clearance Rack items can only be ordered through an online order.)
**************
Also -- we can download My Digital Studio Express for a FREE 30 day trial offer. This offer lasts until the end of February.
CLICK HERE to download MDS Express for FREE for 30 days.
With the FREE trial, you'll get:
- Full access fo the software at NO COST for 30 days.
- Full design functionality.
- Exclusive artwork that comes with My Digital Studio Express. Content here.
- Opportunity to purchase additional downloads from designer paper to stamp brush sets - and everything in between.
- Access to Stampin' Up!s professional print services.
Once your trial period expires, simply contact me or go through my Stampin' Up! website to purchase the downloadable or disc version of the software to continue enjoying and creating with My Digital Studio.
*********
Also, Stampin' Up! recently announced some changes to the catalog program. Sometimes customers were overwhelmed with the offerings in the mini catalogs and felt they didn't have enough time to purchase all the items they wanted. I know I've felt that way. Stampin' Up! listened!
Now there will be only two seasonal catalogs a year in addition to the main catalog. Those two seasonal catalogs will be a little larger and will last longer - 5 months each. The Occasions, Summer, and Holiday mini catalogs will be replaced the the two seasonal catalogs called the Holiday Catalog and the Spring Catalog. The first Holiday Catalog will run from August 1, 2012 to the begining of January 2013. The first Spring Catalog will run from the beginning of January 2013 through May 31, 2013.
The name of the main catalog will change from Idea Book and Catalog to Annual Catalog. The Annual Catalog will run from June 1, 2012 to May 31, 2013. The Annual Catalog will be reduced from over 240 pages in the current Idea Book and Catalog to about 208 pages.
The Definitely Decorative vinyl elements and the Simply Adorned jewerly offerings will not longer be offered.
Please take note: The current Idea Book and Catalog will retire May 31, 2012 - a month earlier than the date printed on the back of that catalog. I just want to make sure you know this so that you can plan ahead.
Recap:
- There will not be another mini catalog right after the current Occasions Mini ends April 30.
- The new Annual Catalog comes out in June.
I anticipate that we will get the current Idea Book and Catalog retirement list in a timely manner closer to May so that we will know the items that will retire from the main catalog. I'll let you know when that list is available.
************
Let me know if you have any questions.
January 2012 Stamp Club
January 7 and 9, 2012
Happy New Year!
Before I begin talking about the cards --
Some tips I recently learned and shared in Stamp Club:
- Use Dawn dishwashing soap to get clear blocks clean and help them to be cling friendly.
- With solid images that sometimes don't stamp evenly
1. Clean the stamp with Staz-On cleaner, dab with paper towel; then clean with Stampin' Mist and cleaner pad. That's a tip you've heard from me before - I really think that helps immensely.
2. Ink the stamp by placing the stamp rubber side up and dabbing the ink pad on it (i.e., opposite from the way we usually ink up a stamp.)
3. Then, if there are still some not evenly inked areas -- push in the top of ink pad (ink pad closed) so that you get an ink palette on the inside of the cover. Pick up ink from here with a blender pen and fill in the less inked areas. And I think I remember that it works better if you go in circles than in lines. The ink pad palette and blender pen create a softer look and work in much better than if you try to fill in the less inked areas with a marker. This idea came from Mary Fish at www.stampinpretty.com on her 12/28/11 blog post.
- With the Framelits and Edgelits - I replaced the card they come on (the are adhered to it with doublestick tape) with Magnet Sheet I ordered out of the Idea Book and Catalog. I just used the cardboard they come on as a guide to cut the magnet sheet. I thought about putting them in the clear cases like the stamps come in, but I think I am going to like the magnet sheet in the clear envelope that the Framelits and Edgelits come in - I'm trying both ways.
Love Tree Card
CASED from Stampin' Up! Sale-A-Bration 2012 catalog
Stamp Set: Easy Events

Stamp Set: Word Play

Edgelit Card
Designed by Helen!
The hearts are made with two different embosslits dies that both cut and emboss the cardstock.
The decorative edge is from the new Edgelits die and the coordinating Adorning Accents embossing folder.

Just Believe with Cork Card
CASED with changes from Ilina Crouse
Stamp set is Just Believe. Cork is from the Stampin' Up! Idea Book and Catalog.

Several of us decided to forego the crochet ribbon and make the card more masculine. We found out we could punch circles out of the cork with the regular hole punch - like the kind you use in an office.
I found out that regular Classic Black ink worked best with the Cork. I tried Staz-On and it did not do well. Staz-On is made for non-porous surfaces ... cork is definitely not non-porous!
The cork oval was cut out with the Oval Frame Die and the Big Shot.

This one has Crumb Cake (I think) Taffeta ribbon.

This one has Vanilla Grosgain ribbon.

Labels Framelit Card
CASED from Kate Coffman but with different stamp set.
Stamp set is P.S. I Love You in the Occasions Mini 2012.
The sentiment stamp set is Heard from the Heart from the main Idea Book and Catalog.
Shapes are made using the new Labels Framelit die in the Occasions mini.


Happy New Year!
Before I begin talking about the cards --
Some tips I recently learned and shared in Stamp Club:
- Use Dawn dishwashing soap to get clear blocks clean and help them to be cling friendly.
- With solid images that sometimes don't stamp evenly
1. Clean the stamp with Staz-On cleaner, dab with paper towel; then clean with Stampin' Mist and cleaner pad. That's a tip you've heard from me before - I really think that helps immensely.
2. Ink the stamp by placing the stamp rubber side up and dabbing the ink pad on it (i.e., opposite from the way we usually ink up a stamp.)
3. Then, if there are still some not evenly inked areas -- push in the top of ink pad (ink pad closed) so that you get an ink palette on the inside of the cover. Pick up ink from here with a blender pen and fill in the less inked areas. And I think I remember that it works better if you go in circles than in lines. The ink pad palette and blender pen create a softer look and work in much better than if you try to fill in the less inked areas with a marker. This idea came from Mary Fish at www.stampinpretty.com on her 12/28/11 blog post.
- With the Framelits and Edgelits - I replaced the card they come on (the are adhered to it with doublestick tape) with Magnet Sheet I ordered out of the Idea Book and Catalog. I just used the cardboard they come on as a guide to cut the magnet sheet. I thought about putting them in the clear cases like the stamps come in, but I think I am going to like the magnet sheet in the clear envelope that the Framelits and Edgelits come in - I'm trying both ways.
Love Tree Card
CASED from Stampin' Up! Sale-A-Bration 2012 catalog
Stamp Set: Easy Events

Stamp Set: Word Play

Edgelit Card
Designed by Helen!
The hearts are made with two different embosslits dies that both cut and emboss the cardstock.
The decorative edge is from the new Edgelits die and the coordinating Adorning Accents embossing folder.

Just Believe with Cork Card
CASED with changes from Ilina Crouse
Stamp set is Just Believe. Cork is from the Stampin' Up! Idea Book and Catalog.

Several of us decided to forego the crochet ribbon and make the card more masculine. We found out we could punch circles out of the cork with the regular hole punch - like the kind you use in an office.
I found out that regular Classic Black ink worked best with the Cork. I tried Staz-On and it did not do well. Staz-On is made for non-porous surfaces ... cork is definitely not non-porous!
The cork oval was cut out with the Oval Frame Die and the Big Shot.

This one has Crumb Cake (I think) Taffeta ribbon.

This one has Vanilla Grosgain ribbon.

Labels Framelit Card
CASED from Kate Coffman but with different stamp set.
Stamp set is P.S. I Love You in the Occasions Mini 2012.
The sentiment stamp set is Heard from the Heart from the main Idea Book and Catalog.
Shapes are made using the new Labels Framelit die in the Occasions mini.


December 2011 Stamp Club
December Stamp Club
December 3 and December 5, 2011
Shutter Peek-A-Boo Card
From Heather Summers from Nicole


Punched Angel Card
CASED from Michele Reynolds
In Stampin' Connection 10/24/11

Delightful Decorations Ornament in
Scalloped Circle Punched Window
CASED, but not sure who from.
Original idea from Diane Schultz

Other cards using the Merry and Bright stamp set:
CASED from Laura Leuenberger/CASED from Tiffany Bauer
In Stampin' Connection November 1, 2011
Some changes made each time

CASED from Barbara Dondero
On Stampin' Connection November 15, 2011


December 3 and December 5, 2011
Shutter Peek-A-Boo Card
From Heather Summers from Nicole

Inside:

Punched Angel Card
CASED from Michele Reynolds
In Stampin' Connection 10/24/11

Delightful Decorations Ornament in
Scalloped Circle Punched Window
CASED, but not sure who from.
Original idea from Diane Schultz

Other cards using the Merry and Bright stamp set:
CASED from Laura Leuenberger/CASED from Tiffany Bauer
In Stampin' Connection November 1, 2011
Some changes made each time

CASED from Barbara Dondero
On Stampin' Connection November 15, 2011

CASED from Donna at ButternutSageDesigns
Posted November 22, 2011

CASED from (will come back and add name when I find that sheet!)


Friday, January 27, 2012


Friday, November 18, 2011
Stamp Club - November 5 and 7, 2011
November Stamp Club
All materials Stampin' Up!
Slide Up Cake Card
One of the cards we did for November was a slide up cake card.
CASED from Lori Heling. See her video:
http://stampingaddict.blogspot.com/
Look at sidebar and for Bring on the Cake
Front of card:

Inside of card. Used Bring on the Cake Stamp set for the sentiments. Just Add Cake Designer Series Paper. Cupcake punch for the candles. Tasteful Trim die and Big Shot for the zig zag on the front.

Burnished Leaves Card
CASED from Melisaa Davies
See http://www.rubberfunatics.blogspot.com/
Used Gently Falling Stamp Set, Classic Ink and sponge daubers - ink colors Pool Party, More Mustard, Always Artichoke, Soft Suede, and Pumpkin Pie. Used Pewter Embossing Powder on this one. We also, on some, used Chocolate Chip and Versamark Inks and then embossed with Clear Embossing Powder for a different look - one with the leaf outlines in brown. Card Base and layer is River Rock; embossing folder used was Elegant Lines.

Punched Baked Turkey Card
Lynn Pratt - original designer
http://www.stampndesign.blogspot.com/
Posted November 5, 2010
Also Terri A. Ransom posted on Stampin' Connection October 25, 2011
This card DIRECTLY CASED from:
Lori Heling posted on Stampin' Connection on October 21, 2011
http://www.stampingaddict.blogspot.com/

Fork Bow Wreath Card
Learned Fork Bow from picture tutorial by Jennifer Timko
http://www.stampinonthefly.com/
also look under Tutorials on the right sidebar and see Quilted Bow - made with Potato Maker. It is a triple bow.
I also did my own picture tutorial for the fork bow using a salad fork as originally instructed. Then I tried it with a meat fork to get a wider bow. Wreath is made by punching out a 1 3/8" hole in Garden Green cardstock and then punching over the hole with the 2 3/8" scalloped circle punch. Bow is made from Cherry Cobbler seam binding.


All materials Stampin' Up!
Slide Up Cake Card
One of the cards we did for November was a slide up cake card.
CASED from Lori Heling. See her video:
http://stampingaddict.blogspot.com/
Look at sidebar and for Bring on the Cake
Front of card:

Inside of card. Used Bring on the Cake Stamp set for the sentiments. Just Add Cake Designer Series Paper. Cupcake punch for the candles. Tasteful Trim die and Big Shot for the zig zag on the front.

Burnished Leaves Card
CASED from Melisaa Davies
See http://www.rubberfunatics.blogspot.com/
Used Gently Falling Stamp Set, Classic Ink and sponge daubers - ink colors Pool Party, More Mustard, Always Artichoke, Soft Suede, and Pumpkin Pie. Used Pewter Embossing Powder on this one. We also, on some, used Chocolate Chip and Versamark Inks and then embossed with Clear Embossing Powder for a different look - one with the leaf outlines in brown. Card Base and layer is River Rock; embossing folder used was Elegant Lines.

Punched Baked Turkey Card
Lynn Pratt - original designer
http://www.stampndesign.blogspot.com/
Posted November 5, 2010
Also Terri A. Ransom posted on Stampin' Connection October 25, 2011
This card DIRECTLY CASED from:
Lori Heling posted on Stampin' Connection on October 21, 2011
http://www.stampingaddict.blogspot.com/

Fork Bow Wreath Card
Learned Fork Bow from picture tutorial by Jennifer Timko
http://www.stampinonthefly.com/
also look under Tutorials on the right sidebar and see Quilted Bow - made with Potato Maker. It is a triple bow.
I also did my own picture tutorial for the fork bow using a salad fork as originally instructed. Then I tried it with a meat fork to get a wider bow. Wreath is made by punching out a 1 3/8" hole in Garden Green cardstock and then punching over the hole with the 2 3/8" scalloped circle punch. Bow is made from Cherry Cobbler seam binding.

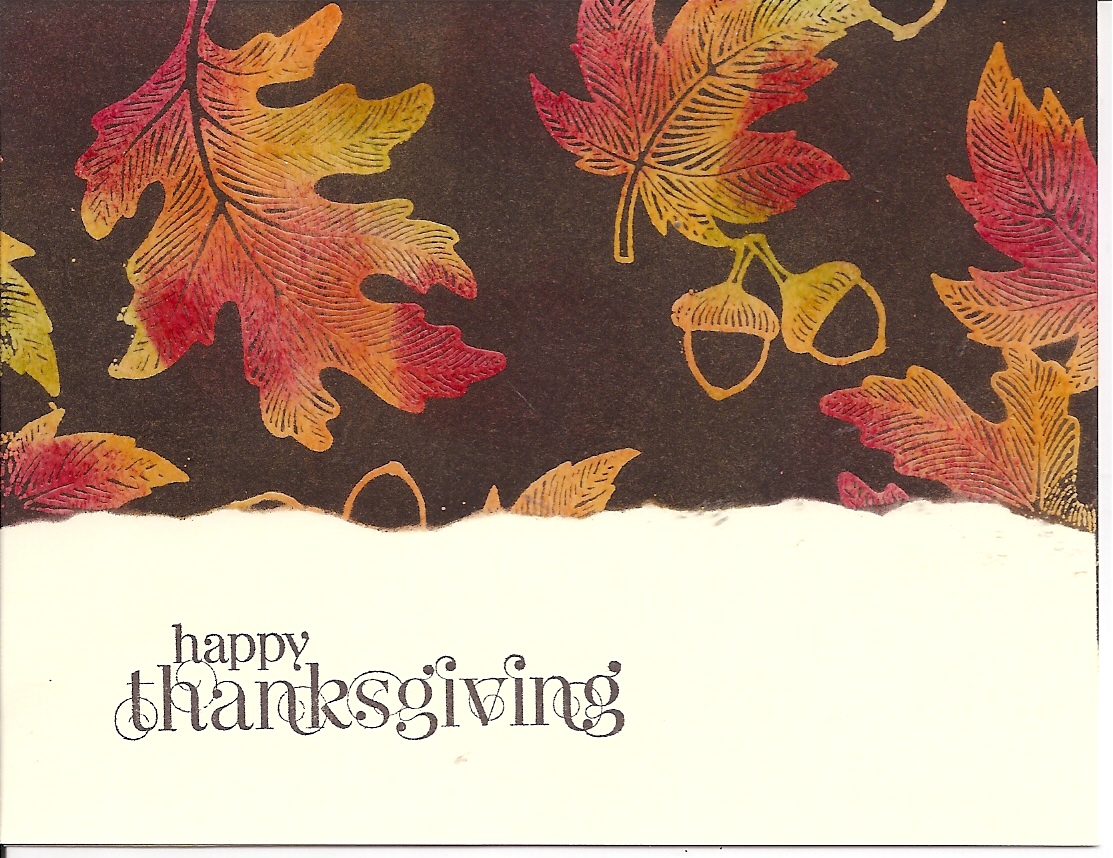
Joseph's Coat Happy Thanksgiving Card
This card was CASED from France Martin - posted on splitcoast on October 23, 2010. See her card here.
This was another card a few of us made. We made this same card November of 2010. The technique is called Joseph's Coat.
Saturday, October 1, 2011
October Stamp Club
October Stamp Club
Saturday, October 1 and Monday, October 3
Pocket Silhouettes Card
CASED from beestamper on http://www.splitcoast stampers.com. Posted July 25, 2010.

Pennant Punch Banner Birthday Card
CASED from kthaman on http://www.splitcoaststampers.com . Posted on July 9, 2011
This is my favorite - I live the Daffodil Delight pennants and the Lucky Limeade background! The pennant set and punch is pretty neat. I've seen banners, Christmas trees, birthday hats, flags, sun rays, star, candy corn, boat sails, and ice cream cones made with this set/punch. And the triangles put together in a mosaic.

Masculine Thank You Card
CASED from Kay Kalthoff in Stampin’ Connection. Posted March 6, 2011.
http://www.stampingtoshare.com/

Crimped Diamond Card
CASED from: Barb Calbick. Posted on Stampin’ Connection on October 24, 2010.
See also: scrapnforfun on splitcoaststampers.com
Dated September 8, 2010; and www.inkymoose.blogspot.com
Video tutorial: http://stampwithtami.com/blog/. On top right, click on Video Tutorials. It is near the bottom
Making the crimped diamond, as we found out, wasn't as difficult as it looks! Makes a very interesting background, don't you think?
The ornament is from Tags til Christmas. The ribbon is the new Quilted Satin ribbon that is in the Holiday Mini Catalog.


Saturday, October 1 and Monday, October 3
Pocket Silhouettes Card
CASED from beestamper on http://www.splitcoast stampers.com. Posted July 25, 2010.

Pennant Punch Banner Birthday Card
CASED from kthaman on http://www.splitcoaststampers.com . Posted on July 9, 2011
This is my favorite - I live the Daffodil Delight pennants and the Lucky Limeade background! The pennant set and punch is pretty neat. I've seen banners, Christmas trees, birthday hats, flags, sun rays, star, candy corn, boat sails, and ice cream cones made with this set/punch. And the triangles put together in a mosaic.

Masculine Thank You Card
CASED from Kay Kalthoff in Stampin’ Connection. Posted March 6, 2011.
http://www.stampingtoshare.com/

Crimped Diamond Card
CASED from: Barb Calbick. Posted on Stampin’ Connection on October 24, 2010.
See also: scrapnforfun on splitcoaststampers.com
Dated September 8, 2010; and www.inkymoose.blogspot.com
Video tutorial: http://stampwithtami.com/blog/. On top right, click on Video Tutorials. It is near the bottom
Making the crimped diamond, as we found out, wasn't as difficult as it looks! Makes a very interesting background, don't you think?
The ornament is from Tags til Christmas. The ribbon is the new Quilted Satin ribbon that is in the Holiday Mini Catalog.

This card we did not make - but had as a display card. In looking at cards online, I saw this one - and saw that one of the stamps in the Four Frames set coordinates with the flower stamp in the Elements of Style set.
Card by Susan Carlson. Posted on Stampin' Connection on April 18, 2011.

Subscribe to:
Posts (Atom)