Welcome to my blog!

Thank you for visiting my blog about cards and other hobbies. Stamp Club is for anyone that would enjoy making cards and learning new techniques - we would love to have you come! We meet the first Saturday of each month or the following Monday (unless changed because of holidays). (Each monthly get together is held those two days - sometimes one day is more convenient than the other!) An Evite is sent out each month - so if you would like to come to Stamp Club, just email me and let me know to put you on the Evite list: helencashon@gmail.com . Sometimes we have Stamp-A-Stacks or other classes also.

Thursday, December 31, 2009

Sock Bouquet

This is the sock bouquet Candi gave me for my birthday. Just wanted to share with you this creative idea for presenting a present of socks! I thought it was pretty neat.

I now have lots of coral, purple/lavender, and white socks! This is 10 pairs of socks, each separate sock made into a rose bud.


Thursday, December 3, 2009

Leftover Packets

Ok -- these are cards that I have leftover packets if you would like to make some of these. If so, please email me back with choices and indicate choice 1, 2, 3 and so on. On some of them, I've put the number of packets I have in parentheses. Also, if someone has already indicated they would like to make a card, I've put their name under it. (No indication of 1, 2, 3 for them cause I am just now asking for that.)


1. Season of Simple Grace (5) Sally G., Susan's friend Jan


2. Soft Suede Thanksgiving (5) Sally G.


3. Easter Trio Punch Cross


4. Fourth of July Thinking of You - not this picture. Already stamped, not assembled.


5. Fourth of July Celebrate (4) Already stamped, not assembled


6. Fourth of July Double Swirly (4) Already stamped, not assembled


7. Fourth of July fireworks (4)


8. Holy Triptych Kraft ribbon (9)


9. Pocket Silhouette Thanks (no packets, but simple enough I can get it together easy - and there are 4 different silhouette flowers I used on different cards)


10. Reinker Spread (3) Sally G.


11. Beginner workshop card (9)


12. Fourth of July Simply Said Stars


13. Rock and Roll (have a bag of pieces -- will have to see if have all of them if anyone interested.)


14. Wedding Verse short black ribbon (7)


15. Shirt from Envelope (10)


Spiral pop up inside is above -- the front is below.


16. Spiral Pop Up Card (10) Jayne H.


17. Large white flower (7) Sally G.


18. Criss Cross Christmas PJ (4) Sally G.


20. Manhattan Embossing Folder Vellum (several - easy to get more together) Sally G.


21. Hidden Message Card (7)


22. Faux Cloisonne (3)


23. Dasher Red and White (7) Susan's friend Jan


24. Wiper Card (5)


25. Crayon Resist pine cone (5)


26. Bleach Dusty Durango Thanks (3?) -- all top note pieces already bleached. More top note pieces than packets.


27. Baroque Birthday (2) Sally


28. Seersucker Petals (8)


29. Christmas wrought iron punch

Wednesday, November 25, 2009

Holiday Sales Special card samples

Stampin' Up! Holiday Sales Special

As mentioned in my email several days ago, here are some cards that use some of the sets or punches mentioned in the Stampin' Up! Holiday Sales Special that lasts for one week only -- November 23 - 30, 2009. (Information about special sent 11/23 by e-mail.) Many of you will remember most of the cards -- we've done them in workshops or they were on the table as samples. And if you're one of my out of town friends, you may have seen some of them in previous posts, but there are a few samples I don't think you've seen.

This card is made with the Love You Much Stamp Set listed with the Heart to Heart Bundle. I just used a marker to ink the "V" and the flower on the LOVE stamp, then put a button over the flower with a glue dot. This card also shows a simple, flat bow just be looping a piece of ribbon and glue dotting each end down, then looping another strip of ribbon over the middle, and then glue dotting it to the strip of ribbon on the card.

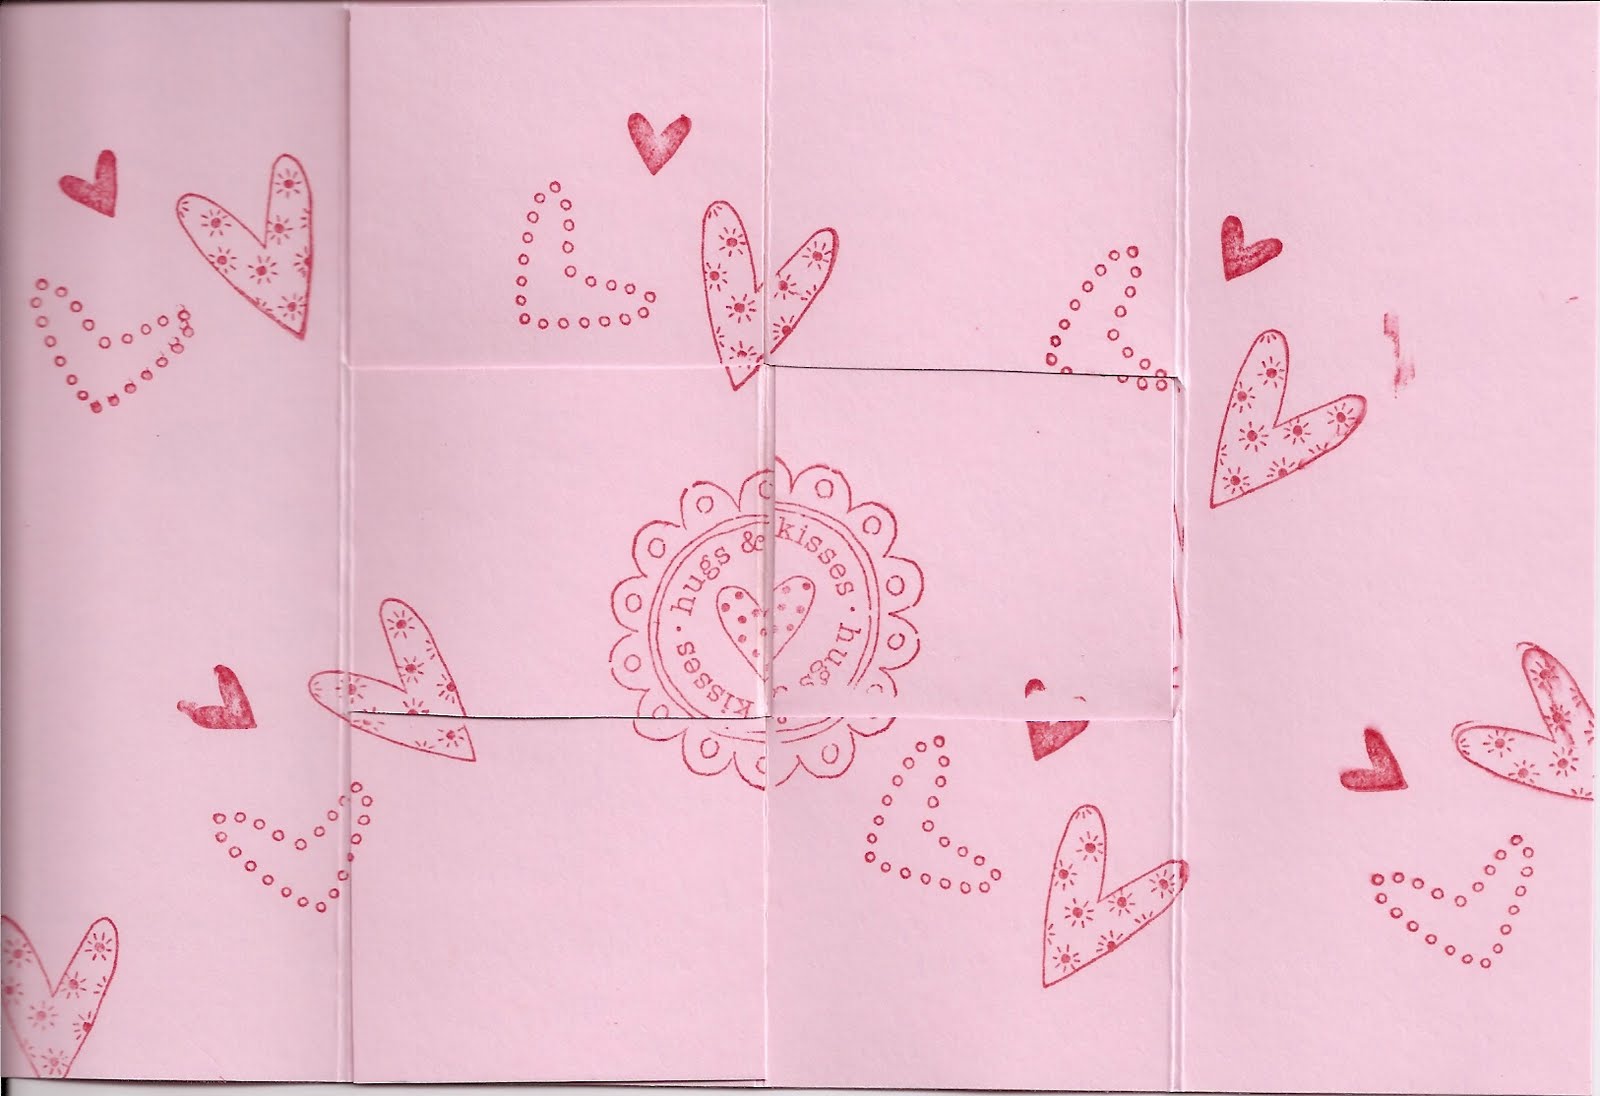
The Heart to Heart punch (all 3 in one punch), also in the Heart to Heart Bundle and also offered by itself at the end of the sales chart, was used on this card. The hearts were punched out of the white and then the white was layered over Real Red cardstock. (The hugs and kisses image is from the All Holidays stamp set - not a part of this sale.)

The Full Heart Punch was used on a strip of cardstock held over the white part of this card. This punch is listed in the Framed With Love Bundle, the Simply Said Bundle, and also as a single item at the end of the sales chart. This card was a technique we did early in the year called Roll with the Punches. The strip, which had 3 hearts punched out, was held over a Whisper White strip of cardstock, then a heart wheel was wheeled over it, then Real Red ink was sponged. Take the punched strip off, and you have these sponged, wheeled hearts on your strip of white.


The Love You Much stamp set and the Heart to Heart punch (listed in the Heart to Heart Bundle) was used on this card. (The "you" definition is from the Define Your Life stamp set, not a part of the sale.)


The Love You Much Stamp set (listed in the Heart to Heart Bundle) was used on this Hidden Message card. Above is the front of the card. It is a also a gatefold card that we learned.


When you open the card, this is what you see -- this is Inside 1 of the card.


Then -- you open the card another way, and this is the Hidden Message -- i.e., Inside 2 of the card. It's a card you would need to hand to someone and then show them how to open it -- or, as I saw done with another type of card -- you would need to send them some directions telling them how to open the card to see the hidden message.


This was a favor done early in the year - using the Love You Much set again as you can see. It was a triangle Hershey Kiss holder.


This card was CASED. The Simply Said stamp set (listed in the Simply Said Bundle) was used here and then the flowers were just covered up with star brads.


The card above and the card below are made with the Fresh Cut stamp set and the Fresh Cut Notes -- they are square note cards 4" x 4". This stamp set and these notes are listed under the Fresh-Cut Bundle on the Sales chart. The cards are different depending on where you stamp the images and what you put behind the flower die cut on the note card. The image on the front of the green card below is behind the die cut on the pink card above.


This was a Father's Day sample card using one of the images from the Eight Great Greetings stamp set, which is listed in the Ultimate Stampers' Starter Bundle. The brown felt ribbon is still available under the Clearance Rack (under Shop Now on my Stampin' Up! demonstrator website). This ribbon is listed as Alpine Ribbon Originals - there are three 8 foot rolls in the package -- one roll of striped grosgrain and two rolls of the brown felt. I really like the brown felt ribbon for masculine cards. Clearance Rack items can be ordered online only.) The set of 3 spools is $6.99.
While I was doublechecking to make sure that brown felt ribbon was still on the Clearance Rack, I found that last year's Christmas designer paper that I used in one of the samples (not the paper we used for our make 'n take) of the Criss Cross Christmas PJ Cards at our November Stamp Club. I liked it because some of the striped sheets had dots inside the stripes. I didn't know then that it was on the Clearance Rack - (or maybe it wasn't there til more recently). It's $4.49. Remember $6.95 minimum shipping though.
The leaf Thank You stamp from Eight Great Greetings (Ultimate Stampers' Starter Bundle) was used on this card. This was the Rolling Marbles Technique I showed several months ago. (Funny demo story in earlier blog entry.)


The Cheep Talk stamp set was used on this Wiper Card. The front of the card is above, and below is the card pulled out so that the little wiper part comes up. This stamp set is listed in the Cheep Talk Bundle.


This is the monogram cards we did one Saturday at Stamp Club - we used the Lovely Letters stamp set that is one of the two sets listed under the Alphabet Bundle. We stamped the letters in Encore Gold ink. Brushed Gold cardstock is layered with Basic Black. This Lovely Letters set is one alphabet set I've really been enjoying using - I love the little decorative part of the letters!
Happy Thanksgiving all!


Sunday, November 15, 2009

Georgia Power Build a Tree


"Eddie" and I did the program at Ambassadors of Georgia Power on Wednesday, November 11. Since it would be challenging and time consuming to try to share two stamp pads and two stamps among 20 - 30 people, we decided to have them use punched shapes.


This tree was a card I had done for the Punch Class way back a year or two ago - showing how you could use the photo corner punch to make a tree.


As I was thinking about what we could do for the Georgia Power program, the thought popped into my mind: "Since Georgia Power has to cut down trees, or parts of trees -- today you're going to Build A Tree!"
They all seemed to enjoy the program and all participated -- all the men participated and built their tree card! "Eddie" and I were most pleased! Some were creative and made their own changes to the design, and we applauded their creativity.


For those that wanted to try their hand at stamping, we had prepared another little card that we had on a table over in the corner. Several came over after the meeting and made a Christmas card with the Merry and Bright set from last year.


Above is the Build a Tree card we did. We used the photo corner punch -- there are two different sized photo corners on the punch. The trunk of the tree we punched with a square punch, which we then cut in half with scissors. (Not "we" -- "Eddie" did 95% of the cutting and preparing of the make 'n take packets.) If you look closely, you can see that the tree trunk is textured so that it looks like bark. I had run the Soft Suede Cardstock through the Big Shot with one of the Texturz plates and was really pleased with the resulting "bark" look.


To make the card, we had a Barely Banana card base (it is more yellow in the picture because I adjusted the picture to make it sharper so can see the tree trunk bark). We built the tree from the bottom up -- we put down the tree trunk about 1" from the bottom of the card. Then the two larger photo corners and then the two smaller photo corners. The photo corners were punched out of Certainly Celery designer series paper.


We had stamped a couple of greetings for them to choose from and punched them out with the wide oval -- so they could glue those inside.


Note to Helen for future: Explain front of card and that tree goes on front. I learn a little something every time!

Display cards from November Stamp Club

These were cards that were on display (we didn't make them, but I called attention to them) at November Stamp Club Some of these cards I had seen on splitcoaststampers and liked. Others are just samples. For the Make 'n Takes we did at November Stamp Club - see 11/13/09 post.

All materials Stampin' Up!

Cased from: hydelter - uploaded to splitcoaststampers on October 26, 2009

This is the Bride designer paper layered onto Sahara Sand cardstock. Angel from Holy Triptych stamped in Sahara Sand. White taffeta ribbon. This card went together really fast.

All materials Stampin' Up!
CASED from Lisa Freeman - who cased from Glenda Travelstead

This card and the one below were made to show the Shimmer Paint. Mixed Champagne Mist Shimmer Paint with alcohol in a mister bottle (about 3/4 full of alcohol and less than a teaspoonful of shimmer paint). Then spray the completed card. It doesn't show on the card above, but you can see it a little bit on the card below. It really gives is a pretty sparkle all over. The whole front of both cards has been sprayed and shimmers. I tried several times to scan it so the sparkle will show, but it doesn't show up. Really need to see it in real life.
I read some more about the alcohol -- if you can find rubbing alcohol that is 90% or more it is better. The higher percentage of alcohol, the less water and therefore the less the paper will curl. If you make this shimmer spray, you will need a fine mister. Also each time you use it, you will need to shake up the mister because the shimmer paint settles to the bottom. Everybody really liked the shimmer it gave the card. The stamped (in Bravo Burgundy ink) ornament is from the Tree Trimmings set in the regular catalog, and the Peace, Love and Joy sentiment is from All Holidays. Cardstock is Whisper White, Brushed Gold, Handsome Hunter, and Bravo Burgundy. Burgundy was embossed with Petals-A-Plenty embossing folder in the Big Shot. Gold elastic cord from the Holiday Mini is adhered above the ornament. The ornament below is from the same set, heat embossed in gold.


All materials Stampin' Up!


All materials Stampin' Up!
CASED from: mathteach - uploaded to splitcoaststampers on October 28, 2009
Whisper White cardstock has been embossed with Stampin' Up!'s Floral Bouquet embossing folder in the Big Shot. Then a piece of red card front was run through the Big Shot with a Texturz Plate from Stampin' Up! Backgrounds I on page 195. Then I punched the ornament out of the texturized Real Red cardstock and tied some of the gold elastic cord around the top. Since I only needed 1/8" border of the red to show behind the white layer, I used the piece of red from which I punched the ornament. Stamped Season's Greetings from Snow Swirled. Colored in the centers of the embossed flowers on the white with Real Red Stampin' Up! marker.


All materials Stampin' Up!

Made this card a year or two ago when I was doing a Punch Class to show use of the Round Tab Punch. This is a Criss Cross card -- horizontal. The directions for this card are on http://www.splitcoaststampers.com under Resources. I think the color is Ruby Red and Ruby Red designer series paper.

All materials Stampin' Up!

I had a red Dasher on red left over from when I was making the sample make 'n take Dasher card and I had left over Handsome Hunter card front from the Tree Trimming cards above, so just put those together. The Handsome Hunter really makes the red Dasher stand out, I think.

This was another napkin I tried the Freezer Paper Napkin Transfer method with. This was a cocktail sized napkin. The bottom and right side had another orange line border and more brown, but I had to cut that part off so the turkey would fit better. The sentiment is from Teeny Tiny Wishes on the Modern Label Punch.

The leaves on the two cards below (they were scanned side by side instead of two separate scans) were also napkin transfer using freezer paper. The napkins that had the pretty yellow/orange that I used to demonstrate the Napkin Transfer technique (see 11/13 post) had only that one part of the napkin in that color - the other 3 squares on the napkin were leaves with a white background. By adhering them to the freezer paper, I was then able to cut the leaves out -- even the intriciate points and the stem - and then glue them to a card front.