Welcome to my blog!

Thank you for visiting my blog about cards and other hobbies. Stamp Club is for anyone that would enjoy making cards and learning new techniques - we would love to have you come! We meet the first Saturday of each month or the following Monday (unless changed because of holidays). (Each monthly get together is held those two days - sometimes one day is more convenient than the other!) An Evite is sent out each month - so if you would like to come to Stamp Club, just email me and let me know to put you on the Evite list: helencashon@gmail.com . Sometimes we have Stamp-A-Stacks or other classes also.

Wednesday, November 25, 2009

Holiday Sales Special card samples

Stampin' Up! Holiday Sales Special

As mentioned in my email several days ago, here are some cards that use some of the sets or punches mentioned in the Stampin' Up! Holiday Sales Special that lasts for one week only -- November 23 - 30, 2009. (Information about special sent 11/23 by e-mail.) Many of you will remember most of the cards -- we've done them in workshops or they were on the table as samples. And if you're one of my out of town friends, you may have seen some of them in previous posts, but there are a few samples I don't think you've seen.

This card is made with the Love You Much Stamp Set listed with the Heart to Heart Bundle. I just used a marker to ink the "V" and the flower on the LOVE stamp, then put a button over the flower with a glue dot. This card also shows a simple, flat bow just be looping a piece of ribbon and glue dotting each end down, then looping another strip of ribbon over the middle, and then glue dotting it to the strip of ribbon on the card.

The Heart to Heart punch (all 3 in one punch), also in the Heart to Heart Bundle and also offered by itself at the end of the sales chart, was used on this card. The hearts were punched out of the white and then the white was layered over Real Red cardstock. (The hugs and kisses image is from the All Holidays stamp set - not a part of this sale.)

The Full Heart Punch was used on a strip of cardstock held over the white part of this card. This punch is listed in the Framed With Love Bundle, the Simply Said Bundle, and also as a single item at the end of the sales chart. This card was a technique we did early in the year called Roll with the Punches. The strip, which had 3 hearts punched out, was held over a Whisper White strip of cardstock, then a heart wheel was wheeled over it, then Real Red ink was sponged. Take the punched strip off, and you have these sponged, wheeled hearts on your strip of white.


The Love You Much stamp set and the Heart to Heart punch (listed in the Heart to Heart Bundle) was used on this card. (The "you" definition is from the Define Your Life stamp set, not a part of the sale.)


The Love You Much Stamp set (listed in the Heart to Heart Bundle) was used on this Hidden Message card. Above is the front of the card. It is a also a gatefold card that we learned.


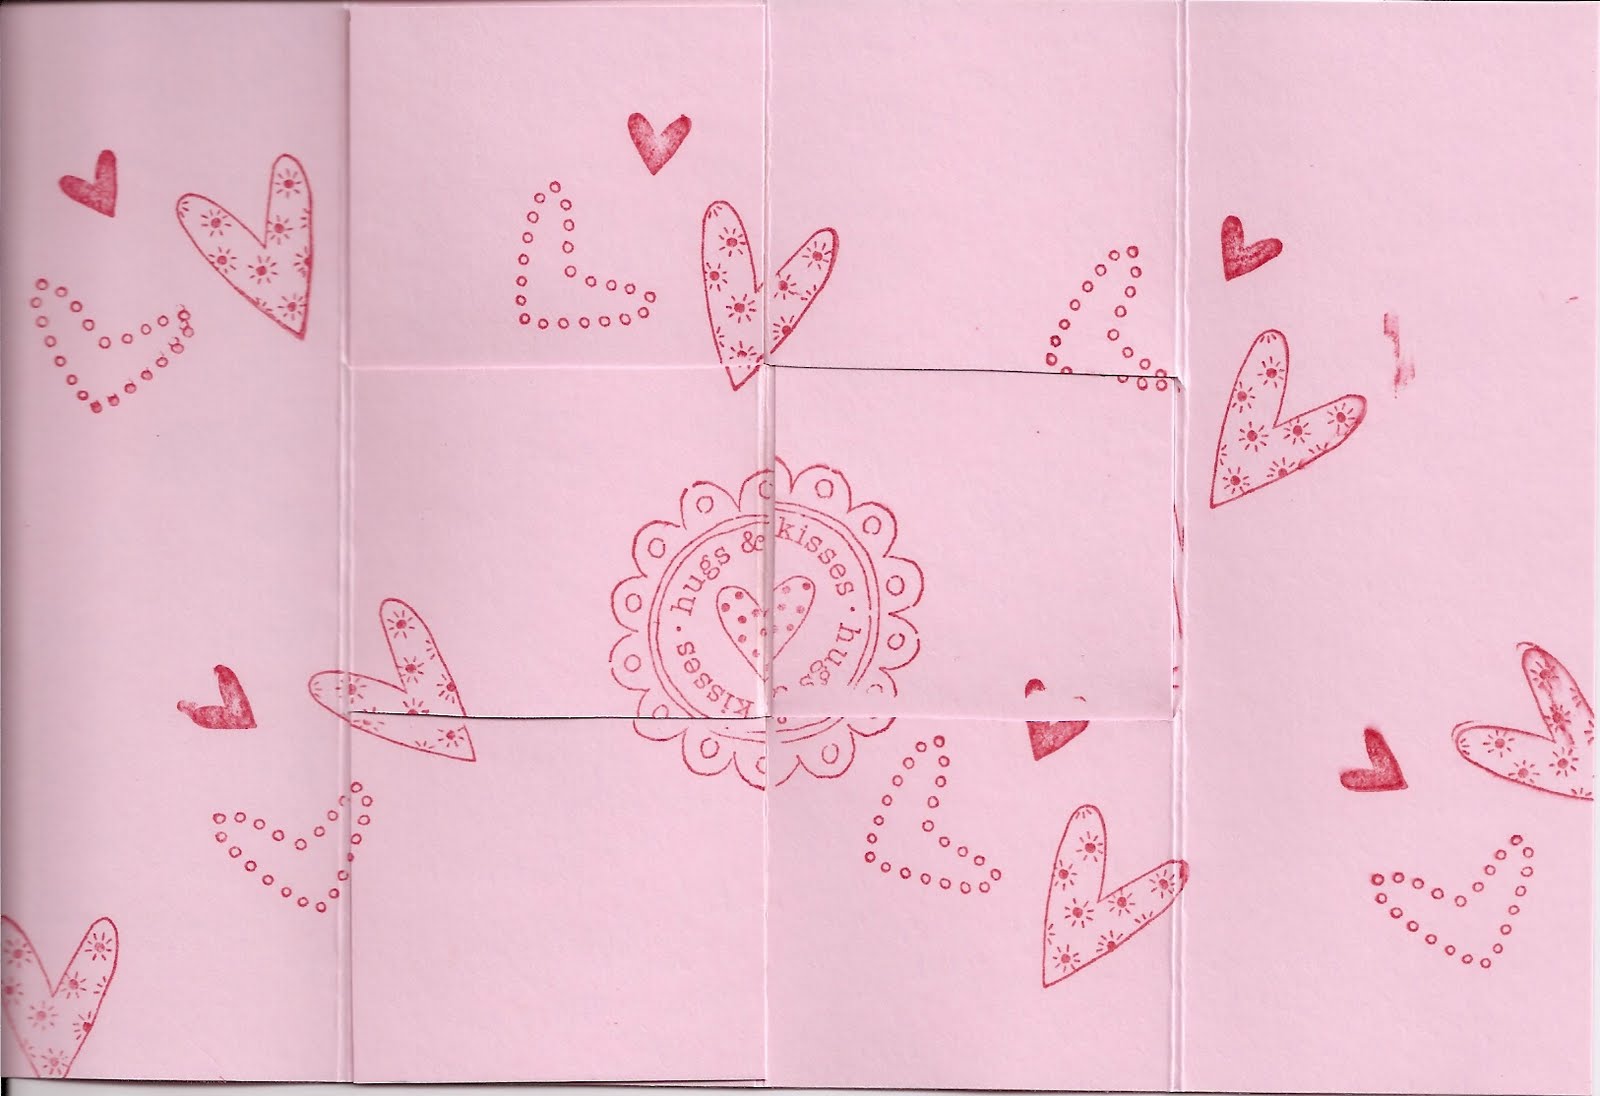
When you open the card, this is what you see -- this is Inside 1 of the card.


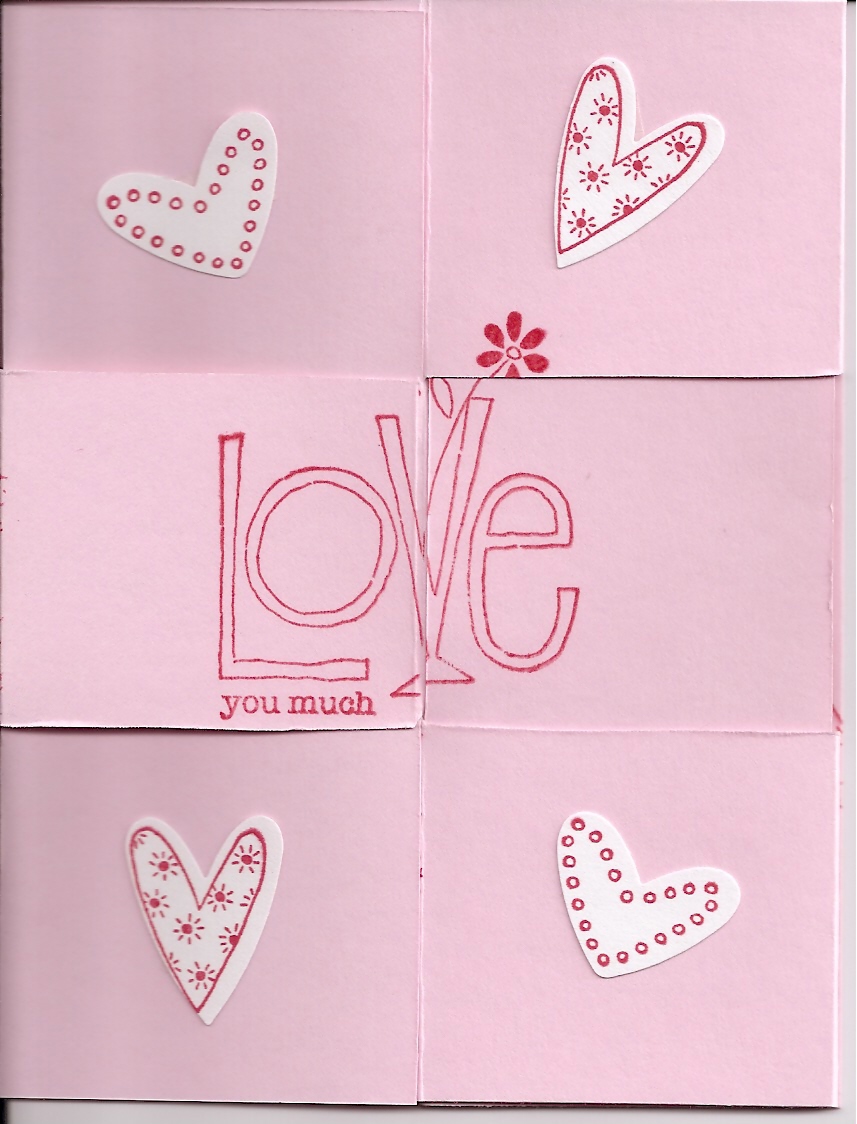
Then -- you open the card another way, and this is the Hidden Message -- i.e., Inside 2 of the card. It's a card you would need to hand to someone and then show them how to open it -- or, as I saw done with another type of card -- you would need to send them some directions telling them how to open the card to see the hidden message.


This was a favor done early in the year - using the Love You Much set again as you can see. It was a triangle Hershey Kiss holder.


This card was CASED. The Simply Said stamp set (listed in the Simply Said Bundle) was used here and then the flowers were just covered up with star brads.


The card above and the card below are made with the Fresh Cut stamp set and the Fresh Cut Notes -- they are square note cards 4" x 4". This stamp set and these notes are listed under the Fresh-Cut Bundle on the Sales chart. The cards are different depending on where you stamp the images and what you put behind the flower die cut on the note card. The image on the front of the green card below is behind the die cut on the pink card above.


This was a Father's Day sample card using one of the images from the Eight Great Greetings stamp set, which is listed in the Ultimate Stampers' Starter Bundle. The brown felt ribbon is still available under the Clearance Rack (under Shop Now on my Stampin' Up! demonstrator website). This ribbon is listed as Alpine Ribbon Originals - there are three 8 foot rolls in the package -- one roll of striped grosgrain and two rolls of the brown felt. I really like the brown felt ribbon for masculine cards. Clearance Rack items can be ordered online only.) The set of 3 spools is $6.99.
While I was doublechecking to make sure that brown felt ribbon was still on the Clearance Rack, I found that last year's Christmas designer paper that I used in one of the samples (not the paper we used for our make 'n take) of the Criss Cross Christmas PJ Cards at our November Stamp Club. I liked it because some of the striped sheets had dots inside the stripes. I didn't know then that it was on the Clearance Rack - (or maybe it wasn't there til more recently). It's $4.49. Remember $6.95 minimum shipping though.
The leaf Thank You stamp from Eight Great Greetings (Ultimate Stampers' Starter Bundle) was used on this card. This was the Rolling Marbles Technique I showed several months ago. (Funny demo story in earlier blog entry.)


The Cheep Talk stamp set was used on this Wiper Card. The front of the card is above, and below is the card pulled out so that the little wiper part comes up. This stamp set is listed in the Cheep Talk Bundle.


This is the monogram cards we did one Saturday at Stamp Club - we used the Lovely Letters stamp set that is one of the two sets listed under the Alphabet Bundle. We stamped the letters in Encore Gold ink. Brushed Gold cardstock is layered with Basic Black. This Lovely Letters set is one alphabet set I've really been enjoying using - I love the little decorative part of the letters!
Happy Thanksgiving all!


Sunday, November 15, 2009

Georgia Power Build a Tree


"Eddie" and I did the program at Ambassadors of Georgia Power on Wednesday, November 11. Since it would be challenging and time consuming to try to share two stamp pads and two stamps among 20 - 30 people, we decided to have them use punched shapes.


This tree was a card I had done for the Punch Class way back a year or two ago - showing how you could use the photo corner punch to make a tree.


As I was thinking about what we could do for the Georgia Power program, the thought popped into my mind: "Since Georgia Power has to cut down trees, or parts of trees -- today you're going to Build A Tree!"
They all seemed to enjoy the program and all participated -- all the men participated and built their tree card! "Eddie" and I were most pleased! Some were creative and made their own changes to the design, and we applauded their creativity.


For those that wanted to try their hand at stamping, we had prepared another little card that we had on a table over in the corner. Several came over after the meeting and made a Christmas card with the Merry and Bright set from last year.


Above is the Build a Tree card we did. We used the photo corner punch -- there are two different sized photo corners on the punch. The trunk of the tree we punched with a square punch, which we then cut in half with scissors. (Not "we" -- "Eddie" did 95% of the cutting and preparing of the make 'n take packets.) If you look closely, you can see that the tree trunk is textured so that it looks like bark. I had run the Soft Suede Cardstock through the Big Shot with one of the Texturz plates and was really pleased with the resulting "bark" look.


To make the card, we had a Barely Banana card base (it is more yellow in the picture because I adjusted the picture to make it sharper so can see the tree trunk bark). We built the tree from the bottom up -- we put down the tree trunk about 1" from the bottom of the card. Then the two larger photo corners and then the two smaller photo corners. The photo corners were punched out of Certainly Celery designer series paper.


We had stamped a couple of greetings for them to choose from and punched them out with the wide oval -- so they could glue those inside.


Note to Helen for future: Explain front of card and that tree goes on front. I learn a little something every time!

Display cards from November Stamp Club

These were cards that were on display (we didn't make them, but I called attention to them) at November Stamp Club Some of these cards I had seen on splitcoaststampers and liked. Others are just samples. For the Make 'n Takes we did at November Stamp Club - see 11/13/09 post.

All materials Stampin' Up!

Cased from: hydelter - uploaded to splitcoaststampers on October 26, 2009

This is the Bride designer paper layered onto Sahara Sand cardstock. Angel from Holy Triptych stamped in Sahara Sand. White taffeta ribbon. This card went together really fast.

All materials Stampin' Up!
CASED from Lisa Freeman - who cased from Glenda Travelstead

This card and the one below were made to show the Shimmer Paint. Mixed Champagne Mist Shimmer Paint with alcohol in a mister bottle (about 3/4 full of alcohol and less than a teaspoonful of shimmer paint). Then spray the completed card. It doesn't show on the card above, but you can see it a little bit on the card below. It really gives is a pretty sparkle all over. The whole front of both cards has been sprayed and shimmers. I tried several times to scan it so the sparkle will show, but it doesn't show up. Really need to see it in real life.
I read some more about the alcohol -- if you can find rubbing alcohol that is 90% or more it is better. The higher percentage of alcohol, the less water and therefore the less the paper will curl. If you make this shimmer spray, you will need a fine mister. Also each time you use it, you will need to shake up the mister because the shimmer paint settles to the bottom. Everybody really liked the shimmer it gave the card. The stamped (in Bravo Burgundy ink) ornament is from the Tree Trimmings set in the regular catalog, and the Peace, Love and Joy sentiment is from All Holidays. Cardstock is Whisper White, Brushed Gold, Handsome Hunter, and Bravo Burgundy. Burgundy was embossed with Petals-A-Plenty embossing folder in the Big Shot. Gold elastic cord from the Holiday Mini is adhered above the ornament. The ornament below is from the same set, heat embossed in gold.


All materials Stampin' Up!


All materials Stampin' Up!
CASED from: mathteach - uploaded to splitcoaststampers on October 28, 2009
Whisper White cardstock has been embossed with Stampin' Up!'s Floral Bouquet embossing folder in the Big Shot. Then a piece of red card front was run through the Big Shot with a Texturz Plate from Stampin' Up! Backgrounds I on page 195. Then I punched the ornament out of the texturized Real Red cardstock and tied some of the gold elastic cord around the top. Since I only needed 1/8" border of the red to show behind the white layer, I used the piece of red from which I punched the ornament. Stamped Season's Greetings from Snow Swirled. Colored in the centers of the embossed flowers on the white with Real Red Stampin' Up! marker.


All materials Stampin' Up!

Made this card a year or two ago when I was doing a Punch Class to show use of the Round Tab Punch. This is a Criss Cross card -- horizontal. The directions for this card are on http://www.splitcoaststampers.com under Resources. I think the color is Ruby Red and Ruby Red designer series paper.

All materials Stampin' Up!

I had a red Dasher on red left over from when I was making the sample make 'n take Dasher card and I had left over Handsome Hunter card front from the Tree Trimming cards above, so just put those together. The Handsome Hunter really makes the red Dasher stand out, I think.

This was another napkin I tried the Freezer Paper Napkin Transfer method with. This was a cocktail sized napkin. The bottom and right side had another orange line border and more brown, but I had to cut that part off so the turkey would fit better. The sentiment is from Teeny Tiny Wishes on the Modern Label Punch.

The leaves on the two cards below (they were scanned side by side instead of two separate scans) were also napkin transfer using freezer paper. The napkins that had the pretty yellow/orange that I used to demonstrate the Napkin Transfer technique (see 11/13 post) had only that one part of the napkin in that color - the other 3 squares on the napkin were leaves with a white background. By adhering them to the freezer paper, I was then able to cut the leaves out -- even the intriciate points and the stem - and then glue them to a card front.


Friday, November 13, 2009

Stampin' Saturday/Monday 11.7.09 and 11.9.09

We had stamping both Saturday and Monday this month - some came on Saturday and others came on Monday, depending on their schedule. It worked out well to spread everyone coming over the two days.

I plan to do several postings over the next week or so. This posting will consist of the cards and technique we did on Saturday/Monday. Then a later post will show some cards I had on display - one showing the Shimmer Paint spray mist.

And "Eddie" asked if she and I could do a stamping program (She is the Program Chairperson) for Ambassadors of Georgia Power - so we did! We had a fun time. A later post will tell you more about that.

And then I've had such a good time using the Crazy for Cupcakes set, I thought I'd upload some cards done using that set.

As I was gathering cards to display at the Georgia Power program - cards showing different techniques we've done over the months -- I thought I'd post some of the cards showing techniques we learned before this blog was begun.

OK - here's November stamping day cards:


NAPKIN TRANSFER TECHNIQUE


This is a great technique to use when you have leftover decorative holiday or party napkins.

This card above was Method 1 we learned with regard to the Napkin Transfer Technique. This one uses Freezer Paper, which I found at the grocery store. The biggest challenge with this is separating the decorative top layer of the napkin from the rest of the napkin. I looked to see if the napkin was 2, 3 or 4 ply so I would know how many layers were involved. I tried just separating them and didn't ever manage to do that. Then I read somewhere about making a small tear in part of the napkin you know you're not going to use and then rolling the edge of the tear - that worked and I was able to separate the top decorative layer from the rest of the napkin. (I tried the technique without separating the layers - does not work well - paper bubbles.)


So - for this technique - you cut a piece of freezer paper a little larger than your planned card front size (in this case A2 card front). Use a DRY IRON - make sure all water is out of iron and that it is not on steam. I put the heat level between Polyester and Rayon. You will need several pieces of copy/printer paper to use as protective layers so your iron won't get messed up.


On ironing board, layer a piece of copy paper, the piece of Freezer Paper - SHINY side up, the the decorative napkin layer (pretty side up), then another piece of copy paper. Make sure all the napkin/freezer paper is covered with the copy paper. Then iron, moving iron over the copy paper and applying gentle pressure, for about 30 seconds. Check to make sure all corners and edges have adhered to the freezer paper. If not, cover and iron some more. Then position the part of the napkin (in this case, the leaves) you want on top of a card front and glue the freezer paper to the card front. Then trim excess freezer paper/napkin to A2 card front size. Add sentiment if desired. This technique was explained by Lynn in St. Louis on splitcoaststampers.


Above is Napkin Transfer - Method 2. This method uses cling wrap, i.e., Saran Wrap. In this case I happened to pick up RED Saran Wrap (didn't realize it was red until later), but it worked fine with this napkin -- just made it a little darker. I also read you could use the plastic that your dry cleaning comes in. Preheat dry iron on Polyester/Rayon.


Most directions for this technique advised using a newsprint paper pad - like a child's doodle pad -- for protection. With this technique, you will be adhering the napkin decorative layer directly to your card front. You will need to separate the decorative layer of the napkin from the rest of the napkin just like in the other method.


So -- open doodle pad and place A2 card front on a thick stack of the doodle pad paper. On top of card front, place a piece of Saran Wrap cut a half inch or so larger than card front on each side. Lay the decorative napkin layer on top of the Saran Wrap. (This napkin piece is larger than the card front also.) Then pull a layer of the doodle pad over the top of the napkin/wrap/card front layer. Make sure there is no Saran Wrap sticking out - you don't want to melt Saran Wrap onto your iron - doubt you would ever get that gooey mess off. Then iron, as described in other method, for about 30 seconds, moving iron and applying gentle pressure. Check corners and edges, iron longer if necessary. Cool. Then trim excess napkin off so that card front is desired card size.


All materials Stampin' Up!


CASED from scrapperLindsey on splitcoast - uploaded November 28, 2008.


This next card is a Criss-Cross Card - a vertical version 5 1/2" tall. Later in the week, when I show other samples, will be a horizontal version. The tutorial for the horizontal version is on splitcoaststampers under Resources. Read this tutorial before reading the rest of this and it may make more sense. You will just cut your 8 1/2 x 11 piece of cardstock in half so that you have two side fold vertical cards instead of the way the piece of cardstock is cut in the tutorial.


For this card, I took two half sheets (5 1/2 x 8 1/2) of Real Red cardstock and folded them in half. I put the two folded cards down on the table with their open sides facing each other and the folded sides on the outside.


Since it is difficult for me to see where the fold is, I put a pencil dot at the top of each card so I can tell where the fold was.


Then I take the card on the left hand side and take the card front and put it on my paper cutter so that I cut a diagonal from the top left to bottom right - and put that card aside.


Then I take the card on my right hand side and cut a diagonal from the dot in the upper right corner to the bottom left corner.


Then, using sticky tape, glue the two rectangle pieces together. So now you have an A2 card that also has triangle pieces on each side, one of which will fold over the other in a few minutes.


For decorative paper, we used 12 x 12 designer series paper Merry Moments and cut a 4" x 5" piece. Then cut it in half diagonally. You may want to use different pieces of paper for these triangles so that you can have different designs on each side. You kinda have to look at the paper and think this out -- if you just cut the one piece in half diagonally, you will end up using one design on one side of the card and the other side on the other side of the card.


Now glue the two triangle pieces onto the triangular pieces of cardstock. There should be a 1/8" border.


Now put some sticky strip on the very bottom edge of the inside of one of the triangles. It needs to be on the bottom edge because if you get it too high, you won't be able to slide your insert card piece in. Also - you need to use the red sticky strip tape for this -- SNAIL or two way glue is not strong enough to keep the pieces together.


Then put sticky strip on the inside of the other triangle and glue it down.


Pocket is made with Tag Punch and Old Olive cardstock. Real Red cardstock Buttons are made with Sizzlits #5 die from the SU! catalog.


For insert, take an A2 card piece and cut 1/4" off one side and 1/2" off the bottom.


The green pull tab is made with the Round Tab Punch - folded in half. Tie the silver elastic cord - which is in the Holiday Mini (deadline January 4, 2010) before gluing it to the top left of the card.


Then slide insert in. I marked where the card front pieces were with pencil. Some just stamped while the insert was in the card and that worked well for them. Stamp sentiment so it shows in the V. We also stamped a sentiment at the bottom of the insert so that you see it when you pull the insert out.


I also tried one with scalloped edges in the V. To do that, you need to move your cut line 1/2" off the diagonal (i.e., move the line out so you have more room) so that you have room for your scalloped edge punch to punch and take off some of the diagonal.


All materials Stampin' Up! (except tissue)


CASED from: Clownsmom - upload group picture November 3, 2009


The make 'n take was the Christmas PJ above. However, I saw a get well one also, so when I was demonstrating how to make the card, I decided to do a Get Well version. I had to work with the tissue in the pocket - had too much tissue beneath the pocket to adhere well - had to trim some. Also, I was going to make both sides of the front with the blue flowers (thought the flowers looked more pajama like), but using the one piece of designer paper cut in half -- that doesn't work - one side has to be the opposite side so that the short and long lengths fit right. So -- to get both sides with the blue flowers will require a little more thought -- and in the middle of teaching and cutting with everybody watching -- I didn't have time to think it through. So the left side ended up being striped since that was the reverse side of the flowered design paper. Base of card is Bashful Blue cardstock; decorative paper is Bashful Blue designer series paper.


All materials Stampin' Up!

CASED from: jacynthe - uploaded to splitcoaststampers on October 1, 2008


Stamp set used: Season of Simple Grace. Embossed in silver. Several people commented that they liked the detail in the robes on this stamp. Layered on Old Olive cardstock. Ribbon is from the Mistletoe ribbon set in the Holiday Mini - I LOVE that ribbon (Ignore the gold edge around the card -- had to put gold paper behind so scanner would pick up all the white of the actual card.) The card I cased from was made last year and was therefore done in Riding Hood Red with the RHR gold trimmed ribbon from last year - and it was beautiful done in red.


All materials Stampin' Up!

CASED from: ScrappyHappy on splitcoast. Card uploaded August 12, 2009.

Real Red cardstock and 5/8" ribbon. Stamp is Dasher from page 208 in the Stampin' Up! catalog - stamped in Real Red classic ink.


Larger Whisper White piece trimmed so that there would be 1/8" border when layered onto the red. Then this white piece was placed in the SU! Petals-A-Plenty embossing folder and run throught the Big Shot.

Wednesday, October 7, 2009

Stamp Club 10.3.09 - Parts I and II

Am submitting two posts again this time - well actually - two parts in one post so you don't have to go looking for another part. This first part are the 3 cards we made (and related materials). The second part is other cards I made ahead of time and had on display and called attention to. Two using Scallop Edge punch to make a medallion; using the A Flower for All Seasons poinsettia in pot stamp because I like that stamp!; and a clear disposable plate decorated for Thanksgiving.


Stamp Club 10.3.09 - Part I -- Workshop Cards etc.

This first card was probably the easiest of all to do at October Stamp Club. I needed something simple since the Bleach card we did had a lot of steps. So - am starting off showing you this one first. Wheat stamp from Autumn Days stamp set was embossed in white (after de-static -ing with Embossing Buddy) toward top of the smaller Soft Suede cardstock piece - leaving room at bottom for Dusty Durango ribbon (11 1/2" length - trim after tying), which we tied on, then layered that Suede cardstock piece onto a Whisper White piece and set aside. Then we stamped "Happy Thanksgiving" from Teeny Tiny Wishes in Dusty Durango ink and punched it out with Word Window Punch. Punched Modern Label punch out of Durango cardstock and glued Word Window sentiment to it, then put it at bottom right of Soft Suede card front. Then went back and adhered the wheat layered pieces to the Soft Suede card front and attached to card base (that has fold on left). On the inside is a sentiment from Falling Leaves stamp set. There's something beautiful about the simplicity of those wheat stems...

CASED from http://www.splitcoaststampers.com/ -- poster: discoverstampin -- dated July 30, 2009.


This next set of pictures uses the new Ornament Punch that is in the Holiday Mini. I'm LOVIN' that punch! Ran across so many neat ideas to use it for, which you'll see in a picture further down. (Since it is the the Holiday Mini the ornament punch won't be available after January 4, 2010 - the punch MAY or MAY NOT be in new regular catalog come July.) It has proven quite popular. This first card is one I had on display in September - had done it very quickly just so I could show a card that time using the ornament punch. This one was done with plain Rich Razzleberry cardstock - but I bet it would have been really neat using designer series paper .


So -- that shows you the Ornament Punch used to make an Ornament. Now -- another use for the ornament punch: a vase! I did two versions below. The one I was casing had the leaf from Great Friend stamp set embossed in white on the "vase." Of the two, I really like that one the best. The white leaf just gives the vase some definition. I made the simpler one on the left in case someone didn't want to take the time to emboss the leaf on there. Everybody did though.
The berry stem coming out the top of the vase is from Autumn Days (I said somewhere else -- I'm loving that set - it's a great masculine set, the berry branch is perfect here on the birthday card, and the other stamps can be used for Fall, Thanksgiving, and Christmas as well . The card base is Sahara Sand. I REEAALLLY like the Sahara Sand, White and Night of Navy color combination.

Card on right (one with embossed leaf on vase) is CASED from: Butternutsage - dated September 18, 2009 - on Splitcoast.


The more simple vase on the left has Happy Birthday sentiment from guess what set? Teeny Tiny Wishes. A birthday verse from Curvy Verses is stamped inside. The other vase on the right has sentiment from Heard from the Heart Stamp set. I didn't stamp anything inside of that one.


Thought I'd show you how to get the vase from the ornament punched shape - since it took me about 4 tries. I tried first cutting off the bottom with my paper cutter -- too much; not straight. Finally, as you can see from my display below -- with my paper snips I cut off just a teeny bit of the bottom of the ornament. And was happy.


As I had looked through cards I saw the ornament punch used for various other things (my mind doesn't work this way, so "out of the box" ideas always fascinate me). I must say, though, I did come up with the two versions of the strawberry - I didn't see those yet! At top in the turquoise, is the ornament. Then leaf - cut off top part and with bone folder make leaf veins - which I then went back and used a pencil to make them more see-able.

Next - my strawberries.

Next row -- you can see how one person figured out how to get a Christmas tree. I did several of those and layered like they had on their card.

Next - in the yellow - they used the top part of the punch to give corner interest. I also saw this part of the punch used on a strip to make a different "border."

And ... my favorite -- the fish made from the ornament punch. Aren't they just the cutest! Especially the turquoise and yellow one with the big eyes on the right! His smile and stripes and tail fin lines are done with pencil. His little yellow fin is the Modern Label punch then punched with 1/2" circle punch. His other fins, as well as the top and bottom fins on the orange fish are the Modern Label Punch. The tail on the orange fish is Photo Corner punch - one of them. His side fin is the 1/2" circle and then negative cut again to get it to look like a fin.

The blue and red fish uses the 5 Petal Flower Punch (several punches) and the Eyelet Border Punch in addition to the Ornament Punch. The lips on both the blue and the orange are the Modern Label Punch with just part of it cut off.


Then -- acorns. One of the caps is made with the Large Oval Punch and one is made with the Scalloped Oval punch. I also saw them done with the Scalloped Edge Punch. Also could punch ornament again in darker cardstock and just cut off part of it for the cap. On all the acorns, I cut the top part to make it look like a stem.


And then last, but not least, the vase.


After I had done this sheet I also saw the Ornament Punched shape turned upside down, drawn on with marker -- and used as a flame for a candle.


So -- I'm starting to think -- how can I hold this ornament shape different ways -- and maybe see something else ?????? Can you?


There was a list someone did on one of the forums about different things could use ornament punch for -- how's this for a list?

radish, onion, butternut squash (not quite sure how you would use these on a card - but I know Cathy was making onion cards last year for the Vidalia onion festival), hot air balloon, top of church (like you see in Russia or Germany), spade, petals of a flower, maybe a Chinese lantern, holiday tags, garland, small frames for photos, leaves, acorns, light bulb, snowglobe (upside down), fish, trees, elf head.

I know Erin said something about a hot air balloon -- so she came up with that one --I had not read that list out at stamp club.

And next - this month's technique - Stamping with Bleach. We all survived, I think, without our clothes being, as Kristina so aptly described her earlier experiences with bleach - a bleach magnet. (What a perfect word description for what happens!) I made the paper towel bleach stamp pad in a Rubbermaid dish pan and we stood up and worked on the island in the kitchen. Had aprons too. And wore clothes that were Ok to get messed up had the bleach jumped on us.


Card CASED from krischir - dated August 11, 2009. She used Autumn Splendor from the Holiday Mini for her leaves though.


I had already cut the Top Note die piece out with the Big Shot. We used the oak leaves stamp from Lovely As a Tree stamp set. This set has been around a long time, but so rightly so. I think someone said they heard it has been the best selling stamp set of all time, and I can see that. It can be used for sooo many techniques and for so many occasions. It is probably THE most versatile set and the most used set. I've seen it used for masculine cards, birthday cards, sympathy cards, fall cards, Christmas cards. Techniques I've seen used are embossing, thumping, highlighting, bleach, brayered background (or in my case I used sponges - that was one of the most beautiful cards I think we've ever made -- while Laneah was still meeting with us, marker to stamp, as a background image for other stamps, etc.


OK - back to the Stamping with Bleach Technique card. First thing was to stamp the leaves around the edge of the Dusty Durango Top Note piece using paper towel/bleach pad. It is important to remember to STAMP OFF one time first - I had several layers of grid paper to do that on. (If you don't stamp off, you're going to most likely get a bleached blob instead of a leaf on your cardstock. I have an example! Then stamp on edge of cardstock piece. Then work way around card, inking up stamp with bleach, stamping off, stamping bleach onto card each time. Set aside to let bleach do its thing. It takes a few minutes for it to process and dry.


In the meantime, you could be working on other parts of the card. We had another piece of Dusty Durango, card front size. We used the Sanded background for that piece - turning the stamp rubber side up, inking it, then putting cardstock over, scrap paper over and pressing and rubbing. Then take off scratch sheet and bring cardstock piece straight up. I tried just using a plain A2 piece for the front of the card -- and it looks much better with the Sanded background.

We then glued that piece to the card base. (Or your whole card base could be Dusty Durango -- but I didn't have enough DD cardstock to do 20 of those + 20 Top Note pieces.)


Once your Top Note piece has dried -- SPONGE the edges with Dusty Durango ink pad. This helps it to stand out on the DD card front. Next adhere the Textured Crushed Curry strip behind it - check to see if one side has more texture. I really like the Textured cardstock.

Next, with Piercing Tool and sponge part of Mat pack, make two holes for brads through the Top Note side points (about 1/4" in) and the Crushed Curry strip. Insert Vintage brads. Important to put brads in at this point because if you waited til later after you glued everything to card front (especially if you were using Dusty Durango as your card base) - then your brads would show on the inside of the card.


Then loop 1/2" width Chocolate Chip ribbon (8 1/2" length) and hold it in that position with a mini glue dot. Adhere it to Top Note piece with another mini glue dot.


Stamp "Give Thanks" sentiment from Holiday Best hostess set in Chocolate Chip onto Whisper White. Punch out with Wide Oval Punch. Adhere this over ribbon with mini glue dots. I used a different adhesive under the oval and it didn't stay down well because of the ribbon under it.


Trim edges of ribbon.


Different colors of cardstock will bleach differently - and some better than others. The bleaching on Basic Black looked like gold. Several colors brought forth yellow or as in the case of the Dusty Durango - a color that coordinates with Crushed Curry or similar. Elegant Eggplant bleached area would coordinate with Blush Blossom. I give this info now -- but a color of cardstock may bleach one way one time and a different batch a year later might bleach a different color.


I think from talking with people that this bleach technique works on Stampin' Up cardstock because it is colored all the way through - it does not have a white core as does most other cardstock.

Here's the Technique card for Stamping with Bleach.


Stamp Club 10/3/09 Part II - Samples on Table


These are samples that were made and displayed on table (course I called attention to them when I was talking too) at Stamp Club on October 3. Lawanda Shepard was the hostess, and she has commented several times that she liked the medallion made using the Scallop Edge Punch. So I made two cards using that medallion. To make this medallion, you start off with a 2 3/4" square. Place it in your scallop edge punch under the lever part so that the same little amount of space shows on both ends (or top/bottom - depends on which way you're looking at it) -- and then punch. Move around to each side of the square and do the same til you've done all four. Result is pretty neat, huh? I understand that this can be done with some of the other edge punches -- I'll have to try the eyelet border punch soon.


Above card CASED from jdance13 - date June 25, 2009, on Splitcoast.
This first card above has the 2 3/4" square cut from Soft Suede cardstock and when ready to assemble it is positioned in the diamond position on the white card base. Before doing that, I cut a smaller square to fit right inside the scallops (I don't remember the measurement.) Then using Soft Suede and Always Artichoke markers, I colored direct to the pine cone/bough stamp and stamped on the Whisper White square. The pine cone/bough stamp is from Autumn Days (like that set a lot!) Then glued that white square to the Soft Suede square and adhered to top part of card base. Then stamped sentiment "Season's Greetings" from Snow Swirled stamp set at bottom. Tied a bow out of Always Artichoke ribbon and set it aside. Put Always Artichoke ribbon strip across (and taped on inside of card) the front of the card. Then put a glue dot on back of the bow and adhered it in the middle of the ribbon. (Believe me, that's a lot easier and it turns out better than trying to tie ribbon around front and then tie into a bow!)


Above card CASED from chrisations.ink on Splitcoast - date October 19, 2008.
I've been wanting to make a card with A Flower for All Seasons set - with the poinsettia stamp. (I have a thing for poinsettias - I remember Mama saying she liked them.) So I made another medallion with the Scallop Edge punch out of Whisper White and stamped the poinsettia pot image directly on the medallion. Then I adhered the white medallion on top of a square of red that was bigger than the medallion. Colored the stamped image with Old Olive, Crushed Curry, and Real Red Markers. I adhered to white card front. (The fold for both this one and one below is at the top. I just punched a Crushed Curry wide oval and didn't stamp anything on it yet -- (mostly because it was REALLY late and I didn't want to go upstairs A-GAIN and bring another stamp back down). But one could do a card this way and then go back and add a sentiment later - like this could be used for a Christmas card or a December birthday card.


I wanted to show that the poinsettia stamp from A Flower for All Seasons also fits nicely into the Wide Oval punched shape, so did card above. Somewhat CASED from OregonStamper - date May 28, 2009, on Splitcoast.


Card CASED from lisahenke on Splitcoast dated August 7, 2009.
This was one of the cards I had thought about for Stamp Club, but then decided on some of the others. I have a blank wheel cartridge I bought for the specific purpose of this card - to ink it with Soft Suede reinker -- but again, it was upstairs, it was late, and I was downstairs. So I inked it up the Bright Blessings wheel with Soft Suede ink pad. To get the part I wanted more easily than trying to position the wheel, I just wheeled the whole 11" direction of the Kraft cardstock. Then I cut out the Blessing part I wanted leaving some blank at the bottom for the Dusty Durango ribbon. Then adhered to Textured Crushed Curry cardstock. Also wheeled the leaf in Durango, colored in the words with Durango marker, cut it out, and pop dotted it up. Glue dotted Chocolate Chip button that had hemp twine tied through it.


This circle above was also done with the Bright Blessings wheel with Dusty Durango ink onto Dusty Durango cardstock. Backed it with Crushed Curry cardstock. Oh how I wished I had the Circle Scissors Plus and mat when I did this. I'm adding them to my Wish List! I then adhered this circle to the bottom of a clear plastic disposable plate with glue dots. I scanned it, but something won't let me upload it to the blog. Maybe I'll take a picture with the camera and upload the plate picture later (like next week or two). I really liked this plate when I saw the one I cased from.
Don't ya just love it when you go to another room (or in my case downstairs) to get something and when you get there, you forgot what you came to get! I just went downstairs to get my October club prep folder and since I couldn't remember what I went down there to get, brought my drink back upstairs and looked at what I had written and then remembered I went for the folder. So back downstairs I went again!
The plate above was CASED from mjscrapper on Splitcoast - dated July 28, 2009.


Saturday, September 19, 2009

Stampin' Saturday 9.12.09

Three cards were demonstrated on 9.12.09 - two "from the past" and one new technique. From the past were the Glitter Window card and the Crayon Resist. The new technique was Faux Cloisonne. After much coaching during class, I can now pronouce cloy-so-nay!


GLITTER WINDOW

So, this first card is the Glitter Window Card. I used a little piece of cardstock the width of the card (folded that little piece in half) so that I could mark the center so I could center the circle punch. The card base is SU! Basic Black and is a half sheet folded in half so that the whole card is black. I marked the center with a pencil down some where I knew it would get punched out.

Then I punched the circle out with the 1 3/8" circle punch. By the way, I typed up the directions for each card station this time if anyone would like me to email them to you. Just let me know.

I thought the Little Boo stamp would work perfect with this technique!

When Laneah sent me a card using this technique years ago, she had a bug behind it and words inside: "Heard you caught a bug!" I loved it!


Before I get into the directions of how to do the glitter window, let me explain how the orange ends are on the Modern Label Punch sentiment. Stamp the "happy halloween" sentiment (from SU!'s Teeny Tiny Wishes - I sure like that set!) on white, then punch out with Modern Label Punch. Also punch out an orange Modern Label Punch. Cut the orange one in half and glue it to the back of the white so that the orange ends stick out to give the white orange ends. Like so:


OK, now for the glitter window. We have the circle punched on the front part of the Basic Black as explained above. Working with the INSIDE front of the card - take a piece of clear packing tape and put it over the hole. I learned, after the first attempt which I stuck to the paper underneath - to do this in my lap so I wouldn't stick it to my grid paper.

This is the INSIDE of the card:

Not shown: After putting packing tape on, flip back over to the actual front of the card - the circle is now sticky where the tape is. Sprinkle Stampin' Up! Dazzling Diamonds glitter, which is a fine glitter, all over the circle and then shake excess off. (The example above does actually have the glitter on the other side.) You now have a glittery circle. Put that aside.

Take a small piece of white cardstock and stamp, in Basic Black, the Little Boo ghost. (Single stamp on page 208 in the Stampin' Up! Idea Book and Catalog). Put adhesive on the corners of this white piece - not close to the stamped image because that image is going to be put so that it shows through the circle. Position the Little Boo circle in the punched circle so that the white margin is even all around and then press to adhere. You can see below the inside front of the card - it is ok if some of the tape shows as well as the white piece - it will be covered.

This is also the inside of the card - first step was the packing tape, second step, shown here, is the white piece that has the ghost stamped on the other side.
Next step, so you won't see the tape and white piece on the inside of the card, is to glue a liner in. See below. A half sheet of white was folded in half and then 1/2" cut off two sides while it was folded. Put adhesive on the back of this. Do not glue together with the pieces lying down - the folds won't work well together if you do that. Pick up the black and hold it mostly folded and then with the white mostly folded insert the white into the black, positioning so that you have even black border, fold together and press to adhere the white into the black. So now the inside of your card is all pretty! And easier to write on since it's rather difficult to write on a black card - unless you have white or silver ink or pen.

The inside of the card all pretty now with the white liner so that you don't see the tape and little piece of white that you glued on the inside front:


FAUX CLOISONNE


To do this technique find a glossy magazine picture or brochure picture that has a wide expanse of color. The color can be solid or it can have variations in it. (The flower above has some orange on the left side.) I like pictures with variation of colors since that is another way of having a variation of color on a flower rather than a solid color like on cardstock. Pictures of sunrises, sunsets, and fire are particularly good for this technique because they have a lot of variations of color. Smaller pictures can be used too - the size just depends on the size of the stamp you're using. (So now everytime I see a magazine picture with an expanse of color I think of this technique!)
This card above used a flower from SU! Embrace Life stamp set. Any line image stamp will work. Fifth Avenue Floral would work well for this also - actually the flower in that set that has a lot of lines would probably work better because you have more lines covering up whatever the picture is you're using. My first try at this I used a brochure that had the Atlanta skyline silhouette in yellows, oranges, and lavender. When I finished, you couldn't tell that the flower was made using the Atlanta skyline!

To do Faux Cloisonne you simply heat emboss (using Versamark pad, gold embossing powder, heat gun) the line image stamp onto the GLOSSY magazine/brochure picture and then cut it out. If the magazine/brochure picture you stamped on is flimsy, you might want to glue it to a piece of cardstock before cutting out to make it stronger. Select colors that coordinate well with it to make your card. On the Faux Cloisonne card above, after stamping the Embrace Life flower, I adhered it to the Dusty Durango strip, then put the Fire circle rhinestone brad in. I put the brad in at this point - had I done it later after the Durango strip was glued to the Crushed Curry card, the brad would have shown on the inside of the card. So after the brad, I adhered the Durango/flower strip to the card. Then I stamped the Happy Birthday to You sentiment (single stamp from previous SU! catalog, p. 208 - presently on Dormant list so still available for purchase) in Dusty Durango. So -- Faux Cloisonne is actually pretty easy!

CRAYON RESIST

The pine branch card above was CASED (although some changes were made) from kellestamps on splitcoast - here.

Click the highlighted "here" above to see her card - I hyperlinked it!

The card front is SU! Always Artichoke cardstock, as is the Large Oval punch under the Word Window. The Merry Christmas sentiment is from Teeny Tiny Wishes, stamped in Always Artichoke onto a scrap piece of Glossy White and punched out with the Word Window Punch. We made and glued that sentiment part together and set it aside. The Word Window punched piece fits perfectly inside the Large Oval punched piece.

The white part of the card front is Glossy White cut to size before beginning. It is cut so that it will have a 1/4" Always Artichoke border after adhering to the AA card front. Glossy White cardstock works best for this technique because it is slick. In the bottom right corner - not too close to the edges - you want to come in and up about 1/2" or so (eyeball what looks best, taking into consideration you will also be putting your sentiment in about same area in top left corner so that they balance each other) -- stamp the pine bough from the Autumn Days stamp set in Soft Suede ink. Let it dry a few seconds while you clean your stamp, put it back up, etc.

Then take a light colored crayon - yes, crayon like we used when we were little! (Marbles last month, crayons this month - we're revisiting childhood!) Some directions say use white crayon, but I find that a light colored crayon works better cause you can tell where you colored whereas with white you can't. I colored most of the pine cones - but not the very top of them (note in the picture that most of the pine cones have white in between the whatever they're called, but not the ones toward the top of each cone); I also highlighted just a few of the pine straws (I was looking at kellestamps sample and highlighted like she did).

Then you take a sponge or sponge dauber and sponge Always Artichoke ink over the image til you like it. During class we decided we liked the way using a sponge piece worked as opposed to the sponge dauber - with dauber you see more of the round dauber circle. This picture was of the one where I used the sponge, not the dauber.

After sponging and letting it dry a few seconds, take a tissue or paper towel and rub across your image. You rub off the crayon - leaving white underneath because the crayon kept the ink from getting to the paper. And that is why you can use any light colored crayon - because in the end, you take the crayon off!

Then eyeball the spacing to balance and adhere your sentiment oval in the upper left corner and complete your card!


Below is another example of Faux Cloisonne with a larger image - one of the flowers from Fifth Avenue Floral (the one I talked about above that has lots of lines). They were stamped in Soft Suede also. You don't have to get all the area of the inside of the flower colored in -- you just color it some. Then, instead of sponging, I used the brayer and Crushed Curry ink pad and brayered that ink all over the Glossy White strip with the colored flowers on it. (Do this on top of a piece of scratch paper/grid paper as you will get it on more than just your little strip of glossy cardstock.) As you continue to brayer on the color, it gets absorbed really well by the Glossy White cardstock and is very even - it's amazing how even it gets. Turns out really pretty. Wendy Weaver had a tip here - I'll have to think to remember what it was. Then, after brayering on the color, rub the crayon off the flowers - and you have partially white flowers!
Aha -- a day later - I have remembered Wendy's tip! When stamping on glossy cardstock, your stamp will have a tendency to slide because of the slickness -- so carefully press down to stamp and then bring your stamp straight up.

The Glossy White (now a shiny Crushed Curry from the ink) strip is then backed in Dusty Durango and adhered to Soft Suede card front. Modern Label punched sentiment is again from Teeny Tiny Wishes.


This Crayon Resist technique will work on Stampin' Up!'s Whisper White cardstock also because it has a slick finish - although not as slick as the Glossy White. So it works, although not as well. And note that the brayered Crushed Curry is not quite as even - it doesn't soak into the WW cardstock as well as it did the Glossy and I could see some of my brayer lines. This butterfly is from the God's Beauty hostess set from the Spring Summer 2009 catalog. All other stamps above are in the present 2009-2010 Idea Book and Catalog (except the Happy Birthday to you stamp also in the last catalog/on dormant list).


We've also learned that it is a good idea to keep your brayer in the box as the rubber can get nicked easily as you put your brayer in with all kinds of other tools - and then the place where it is nicked will show up on whatever you are brayering. But -- if that happens, don't throw away that rubber roll that has gotten messed up -- it can be covered with rubber bands to create a rubber band background!

Happy Stampin'!